Website Weather Widget using an Excel Sheet
Show today's weather on your website.
In this short tutorial we're going to show you how to create a Live weather widget on your website using a Excel Online spreadsheet.
Our goal is to display today's weather information in an attractive widget, automatically updated whenever your spreadsheet changes.
format_list_numbered 1. Create and populate your Spreadsheet
This spreadsheet will hold the weather data we're going to display on the webpage. If you need to edit anything data-wise, this will be where you'll do it.
To create your own spreadsheet containing live weather data, follow this tutorial on visualcrossing.com. If you'd like to do that later, use our example spreadsheet link below to proceed.
Example weather data spreadsheet link: https://1drv.ms/x/s!AnONTscVSMXNgTrqc-TH_1ZEg1N0?e=skcF05
As you can see it contains today's weather information for London.
Our goal is to get this displayed on our website in a small attractive widget, as shown below.

add_circle 2. Create Spreadsheet API
Using sheet2api, Create your Spreadsheet API by pasting the spreadsheet link from the previous step into the form.
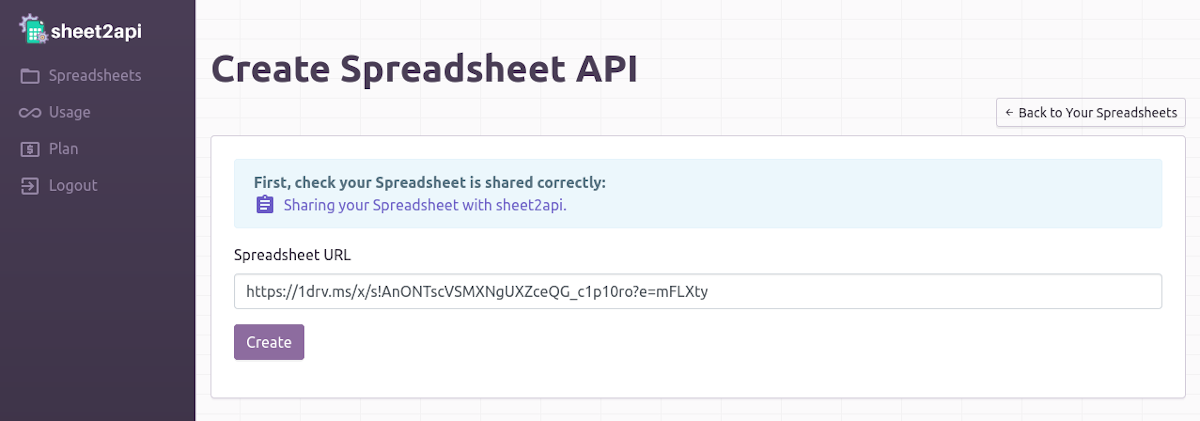
Click Create 🚀. Your new Spreadsheet API will be listed on the next page.

code 3. Create our webpage & weather widget
Create a file called index.html with the below contents:
<!DOCTYPE html>
<html>
<head>
    <meta charset="utf-8">
    <link href="https://getbootstrap.com/docs/4.0/dist/css/bootstrap.min.css" rel="stylesheet">
    <style>.card-text, .card-title { text-shadow: 1px 1px #333;}</style>
</head>
<body>
    <div class="container">
        <h1>Today's Website Weather Widget using a Spreadsheet</h1>
        <br/>
        <div data-spreadsheet-api="<YOUR_API_URL_HERE>">

            <div class="card bg-dark text-white" style="width: 500px; height: 250px; background: url({{ Image }}); background-size: cover; ">
                <div class="card-img-overlay">
                    <h5 class="card-title"><b>City: {{ Location }}</b></h5>
                    <p class="card-text"><b>Min: {{ Min Temp }}℃</b></p>
                    <p class="card-text"><b>Max: {{ Max Temp }}℃</b></p>
                    <p class="card-text"><b>🌅 Sunrise: {{ Sunrise }}</b></p>
                    <p class="card-text"><b>🌇 Sunset: {{ Sunset }}</b></p>
                </div>
            </div>

            <br/>
        </div>
        <script src="https://sheet2api.com/v1/template.js"></script>
    </div>
</body>
</html>
Now in that file replace <YOUR_API_URL_HERE> with the URL to your spreadsheet API (from Step 2).
Save that file and open it up in your web browser. You should now see the weather data and images from your Spreadsheet via your sheet2api API!

When your Spreadsheet gets updated with weather data, so will your webpage, automatically! 🤖
check_circle It's as easy as that! 🎉
Need help? Feel free to reach out via our contact page.
Start using sheet2api now
Be up & running in seconds.
Try for FREE