Pre-launch web page using a Google Sheet
Create a pre-launch page that collects email addresses using Google Sheet as your database.
In this tutorial, we'll create a simple pre-launch/coming soon page that collects email addresses from interested users. All submissions will be stored in a Google Sheet spreadsheet.
We'll start with a basic Bootstrap template and add the functionality to collect and store email addresses.

table_chart 1. Setup your Spreadsheet
First, create a new spreadsheet in Google Sheet with this structure:
| A | B | C | D | |
| 1 |
You can view our example spreadsheet here: https://docs.google.com/spreadsheets/d/1NtWA9pEFffcSG-VCBY32gV0ym4Jm4JQ5L5nr_e3002g/edit?usp=sharing
settings 3. Configure your API
Click "Configure API" to secure your Spreadsheet API.
Under API Permissions, disable everything except Create. This ensures users can only submit data but not read or modify existing entries.
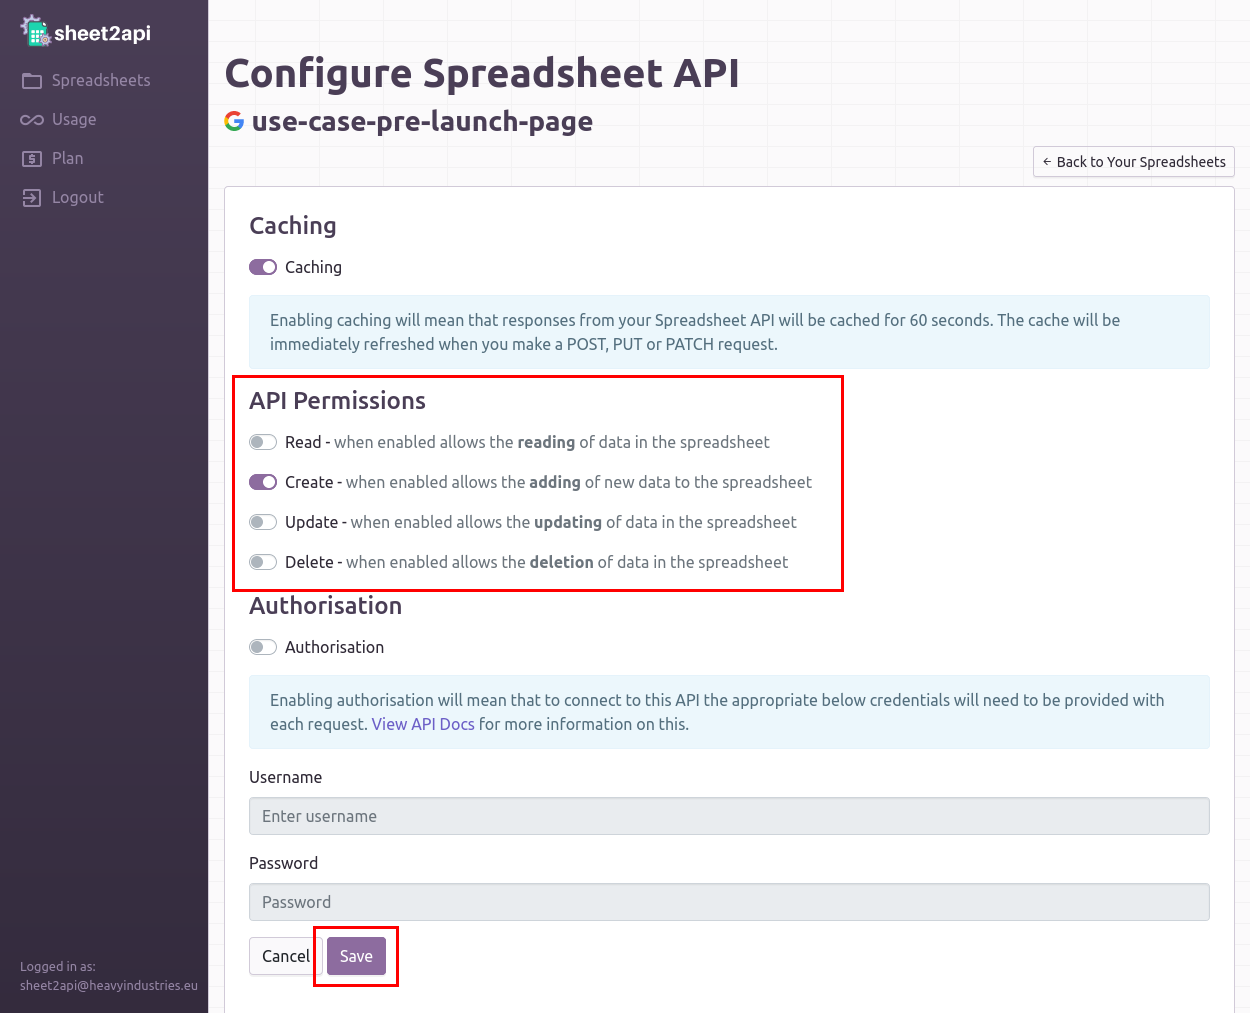
Click "Save" to apply the changes.
code 4. Add the Form
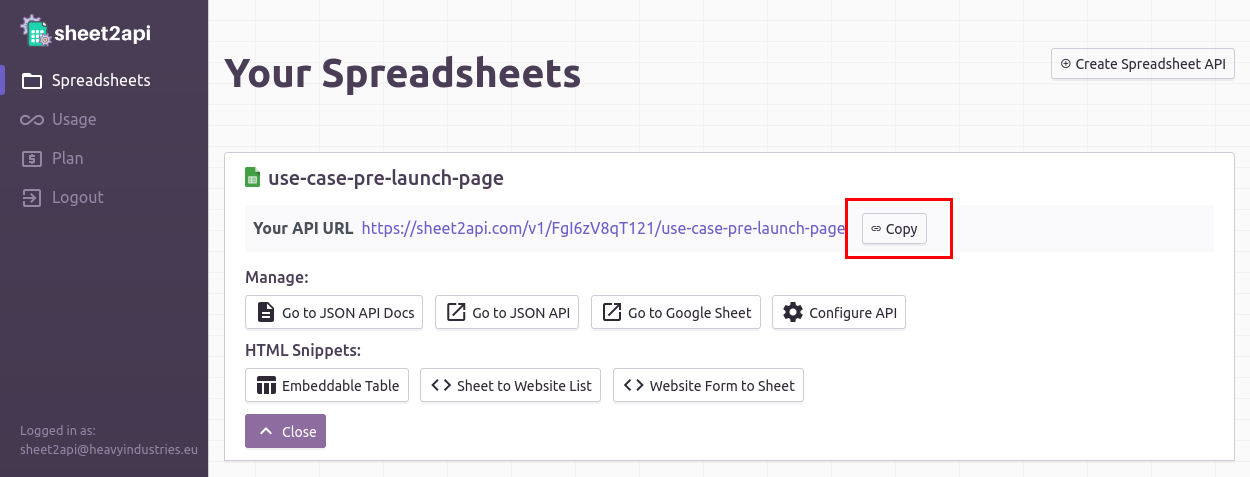
Copy your API URL from the Spreadsheets page:
Update your form HTML with the sheet2api attributes:
<!-- Signup Form -->
<form id="signup-form" method="post" data-spreadsheet-api="YOUR_API_URL">
    <input type="email" name="email" id="email" placeholder="Email Address" />
    <input type="submit" value="Sign Up" onClick="alert('We will be in touch')"/>
</form>
Add the sheet2api script before the closing body tag:
<script src="https://sheet2api.com/v1/template.js"></script>
</body>
cloud_upload 5. Host your Page
You can host your pre-launch page for free using Github Pages:
-
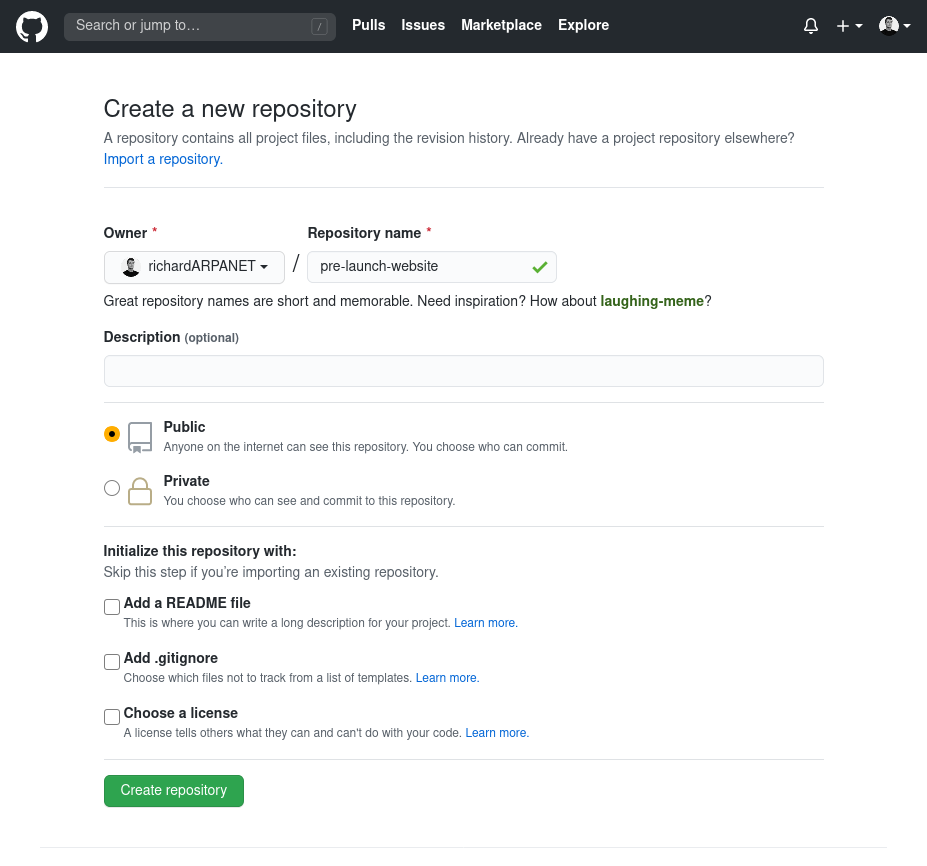
Create a new repository on Github
-
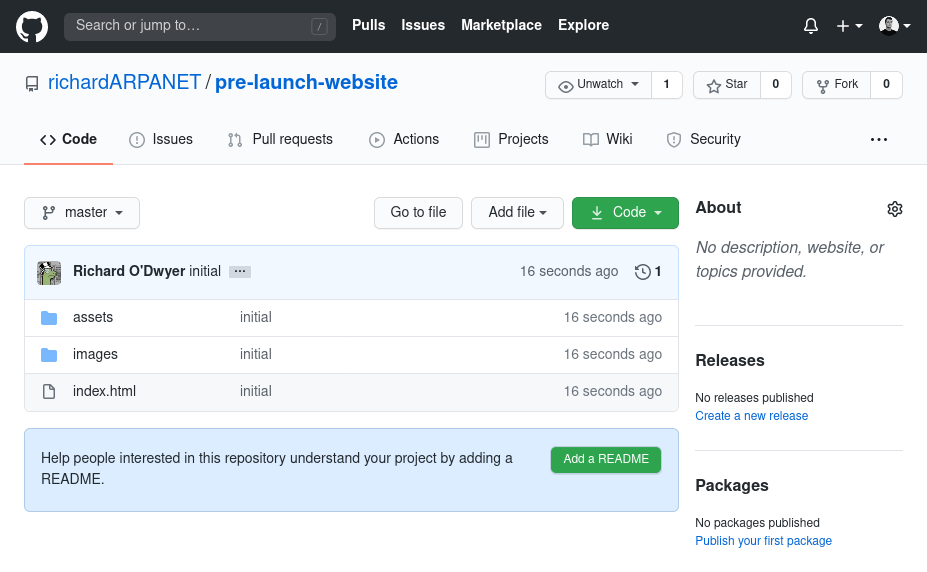
Add your web page files to the repository
-
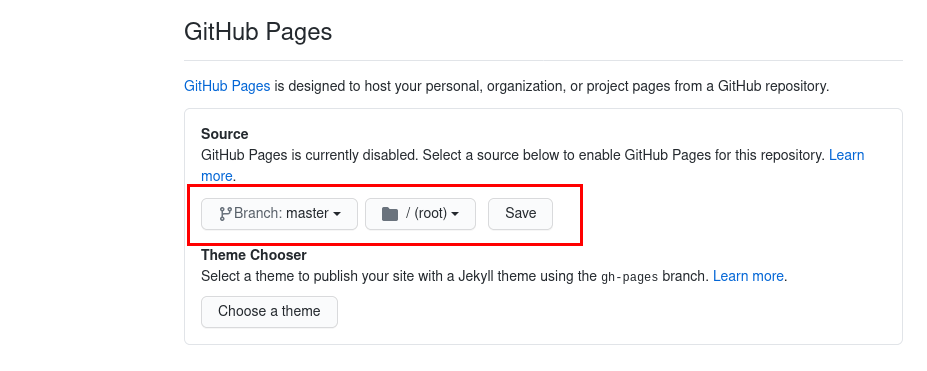
Enable Github Pages in your repository settings
-
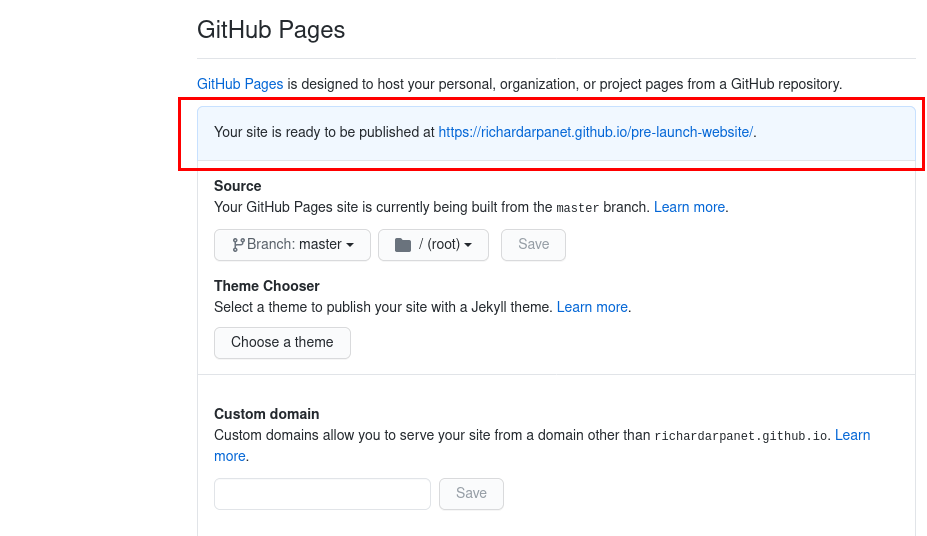
Access your live page using the provided URL
link Useful Links
check_circle It's as easy as that! 🎉
Need help? Feel free to reach out via our contact page.
Start using sheet2api now
Be up & running in seconds.
Try for FREE